
Introduction
Home Renovation Planning Checklist | Renovating a home can quickly become overwhelming when the budget keeps changing, contractors need decisions you haven’t made, or unexpected repairs interrupt the original plan. Even a relatively small kitchen, bathroom, or bedroom renovation can become stressful without a clear strategy.
A Home Renovation Planning Checklist helps you organize every important decision before construction begins. From defining your goals and inspecting your property to choosing contractors, preparing materials, and checking the finished work, a structured plan makes it easier to control costs and avoid unnecessary delays.
Whether you’re updating one room or renovating an entire property, the key is to understand what needs to happen, when it should happen, and how each decision affects the next stage. The guidance available at Preppy Room can help you explore practical home improvement considerations alongside the planning process.
This guide explains how to create a realistic renovation plan, establish a working budget, compare professional estimates, arrange approvals, prepare your household, monitor construction, and complete the final inspection. You’ll also find practical examples, common mistakes, professional recommendations, and checklists you can use throughout your project.
1. What Is a Home Renovation Planning Checklist?
A home renovation planning checklist is a structured list of tasks and decisions that helps homeowners prepare, organize, and monitor a renovation project. It covers the work that must be completed before construction, the decisions required during the project, and the checks needed before the renovated space is handed over.
A useful checklist turns a broad idea into a series of manageable steps. Instead of trying to remember everything, you can record your requirements, assign responsibilities, establish deadlines, and track outstanding tasks.
A complete renovation checklist generally includes:
- Project goals and priorities
- Property condition and repair requirements
- Budget estimates and contingency funds
- Design decisions and measurements
- Contractor selection and written agreements
- Permits, approvals, and inspections
- Material ordering and delivery arrangements
- Construction scheduling and household preparation
- Progress monitoring and change management
- Final inspections, documentation, and maintenance
Why Is a Checklist Important?
Renovation work involves several connected activities. For example, replacing kitchen cabinets may affect electrical outlets, plumbing connections, flooring, countertop measurements, and appliance positions. If one decision is delayed, several other tasks may need to be rescheduled.
A checklist helps you identify these dependencies before they become expensive problems.
It also gives you a clear way to communicate with contractors. You can compare quotations against the same requirements, identify missing items, and establish what completion means before work begins.
Professional tip: Keep one master checklist for the entire project. You can maintain separate sections for each room, but all budgets, deadlines, approvals, and important decisions should be recorded in one central place.
2. Define Your Renovation Goals Before Spending Money
Before requesting quotations or buying materials, identify the problems you want the renovation to solve. A clear objective prevents unnecessary upgrades and helps you allocate your budget to the improvements that matter most.
Identify the Main Purpose of the Renovation
Different renovation goals require different planning decisions.
| Main objective | What to prioritize |
|---|---|
| Improve everyday comfort | Room layout, lighting, storage, and usability |
| Repair an aging property | Structural condition, moisture, plumbing, and electrical systems |
| Modernize interiors | Finishes, fixtures, colors, and consistent design |
| Improve energy performance | Insulation, ventilation, windows, and equipment |
| Prepare a property for sale | Essential repairs, broad appeal, and presentation |
| Accommodate changing household needs | Flexible spaces, accessibility, and additional storage |
Choose three primary outcomes and write them down. These should guide the rest of your decisions.
For example, a homeowner with a cramped kitchen might prioritize better movement between work areas, improved storage, and brighter task lighting. Replacing every cabinet or purchasing premium appliances may not be necessary if the existing items are functional.
Separate Essential Repairs From Optional Improvements
Divide proposed work into three categories.
Essential work: Safety issues, active leaks, significant damage, and necessary repairs.
Functional improvements: Better storage, more convenient layouts, improved lighting, and practical fixtures.
Optional upgrades: Decorative features, luxury finishes, and nonessential accessories.
This distinction becomes particularly useful when quotations exceed your original expectations.
If the available budget cannot cover everything, protect essential work first. Optional improvements can often be postponed without compromising the safety or functionality of the property.
Create a Written Project Brief
Your project brief should describe the intended outcome, rooms involved, preferred finishes, practical requirements, and budget limitations.
Include photographs of existing conditions for your own records if useful, but rely on written measurements and specifications for technical decisions.
A clear brief gives contractors a consistent starting point and reduces misunderstandings about what the project includes.
3. Inspect the Property Before Finalizing the Scope
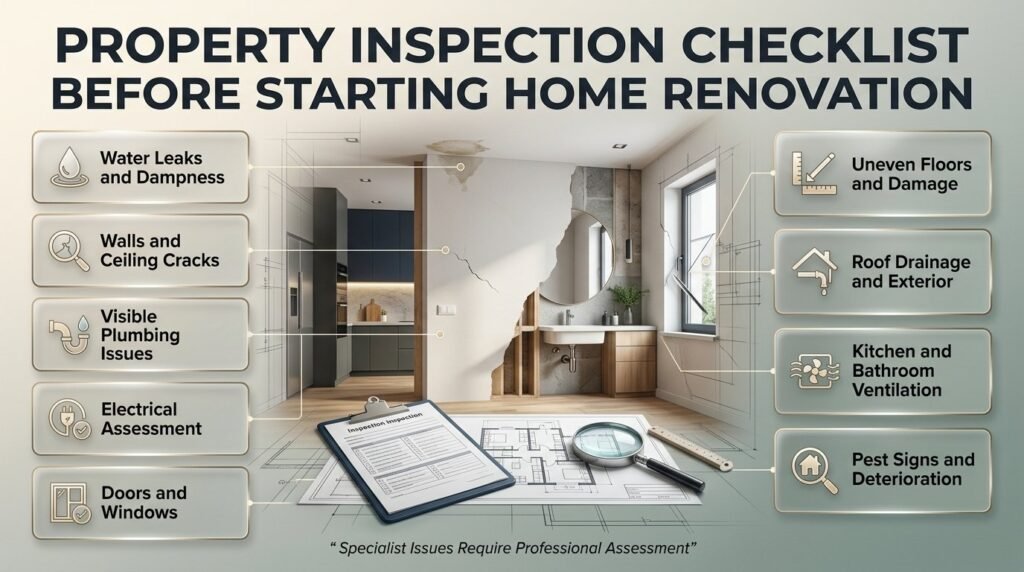
A renovation should begin with an understanding of the property’s existing condition. Attractive finishes cannot compensate for unresolved moisture, damaged wiring, leaking plumbing, or structural problems.
An initial inspection helps you identify visible concerns and decide whether specialist assessments are necessary.
What Should You Check?
Use this preliminary inspection checklist:
- Look for water stains, leaks, and signs of persistent dampness.
- Check walls and ceilings for unusual cracks or movement.
- Inspect visible plumbing for corrosion or leakage.
- Identify electrical components that may require professional assessment.
- Check doors and windows for damage or poor operation.
- Examine accessible floors for uneven areas and deterioration.
- Inspect visible roof drainage and exterior surfaces.
- Check ventilation in kitchens, bathrooms, and damp areas.
- Look for signs of pests or deterioration around openings.
- Record existing damage before contractors begin work.
This checklist is a preliminary review, not a substitute for a professional property inspection. Do not disturb suspected hazardous materials or attempt specialist electrical, structural, or roofing inspections without suitable qualifications.
Investigate Problems Before Covering Them
A fresh coat of paint may hide a stain temporarily, but it won’t solve the source of a leak. Similarly, installing new flooring over a damaged or persistently damp surface can lead to further problems.
A sensible approach is to investigate the cause, determine the appropriate repair, and then plan the finishing work.
If you need a broader understanding of recurring household upkeep, the Home Maintenance guide provides a useful starting point for organizing routine care.
For a wider perspective on looking after a property, consult Care for a Property.
Common mistake: Finalizing the entire budget before checking the property’s condition. Visible surfaces can conceal problems that change the scope, cost, and duration of renovation work.
4. Establish a Realistic Home Renovation Budget
A reliable renovation budget includes more than the price of visible materials and the contractor’s labor. It should account for preparation, professional services, approvals, delivery, waste removal, possible temporary accommodation, and unexpected conditions.
The aim is to understand the full financial commitment before agreeing to start.
List Every Major Cost Category
| Cost category | Examples |
|---|---|
| Planning and design | Surveys, drawings, design work, and consultations |
| Permissions | Application charges and required inspections |
| Preparation | Surface protection, demolition, and removal of old fixtures |
| Labor | Contractors, installers, and specialist trades |
| Materials | Flooring, paint, cabinets, tiles, and fittings |
| Building systems | Electrical, plumbing, ventilation, and heating or cooling |
| Finishing | Painting, trim, hardware, and adjustments |
| Logistics | Transport, delivery, storage, and waste disposal |
| Temporary arrangements | Alternative cooking, washing, or accommodation |
| Contingency | Unforeseen repairs and approved additional work |
Ask contractors for itemized quotations so you can understand where the money will go.
For a more detailed explanation of individual construction expenses, use Construction Cost Breakdown Explained.
You can also review How to Plan a Construction Budget to organize estimates, financial commitments, and spending priorities.
How Much Contingency Should You Allow?
A contingency reserve is money set aside for unexpected costs that arise during the project. It should be separate from the funds allocated to planned materials and upgrades.
For preliminary planning, homeowners sometimes use a reserve of around 10–20% of the estimated renovation cost. The appropriate amount depends on the age of the property, the complexity of the work, the quality of the initial inspection, and the likelihood of hidden problems.
For example, if your estimated renovation cost is 400,000 in your local currency and you allow a 15% contingency, the reserve would be 60,000. Your working budget would therefore be 460,000, before adding any other expenses excluded from the original estimate.
This is a planning example, not a guarantee that the reserve will cover every possible problem.
Calculate the Complete Working Budget
Use this formula:
Working budget = Estimated project cost + Contingency reserve + Excluded expenses
Check whether the quotation includes applicable taxes, delivery, professional fees, utility adjustments, and disposal costs.
If the total is higher than you can comfortably afford, revise the project scope before signing the contract. Removing optional work at the planning stage is usually easier than making disruptive changes halfway through construction.
Professional tip: Keep a simple budget tracker showing the original estimate, approved commitments, payments made, remaining contractual costs, and contingency balance. Review it regularly rather than relying on your bank balance alone.
5. Prioritize Projects in the Right Order
A renovation becomes easier to manage when work is completed in a logical sequence. Prioritization helps protect the budget and prevents newly finished surfaces from being damaged by later repairs.
Which Tasks Should Come First?
A general priority structure is:
- Safety concerns and significant structural problems.
- Water entry, drainage, and moisture-related repairs.
- Necessary plumbing, electrical, and other building-system work.
- Approved layout changes and major construction.
- Wall preparation, flooring, cabinets, and fixtures.
- Painting, decorative finishes, and accessories.
The exact order depends on the building and project. Some tasks need to be coordinated closely, and specialist contractors should determine the appropriate sequence for technical work.
For example, electrical cables or plumbing connections may need to be installed and inspected before walls are closed. Installing decorative wall finishes before those tasks are completed can create avoidable rework.
Should You Renovate One Room at a Time?
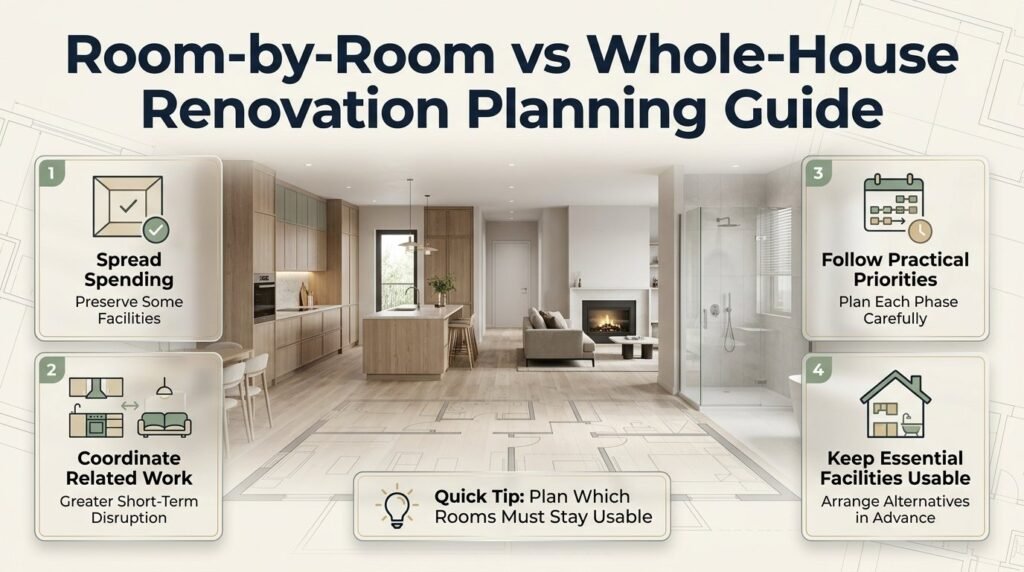
Both room-by-room renovation and whole-house renovation can be suitable.
| Approach | Main advantage | Main limitation |
|---|---|---|
| One room at a time | Spreads spending and preserves some household facilities | Can extend the overall project |
| Multiple connected rooms | May improve coordination and reduce repeated setup | Creates greater disruption and higher short-term costs |
| Phased major renovation | Allows work to follow financial and practical priorities | Requires careful scheduling between phases |
Consider the household’s needs before deciding. If a property has only one usable bathroom, taking it out of service before arranging an alternative may cause significant inconvenience.
Similarly, combining kitchen flooring with cabinet replacement may make sense because both tasks affect the same area.
Quick tip: Identify which rooms and facilities must remain usable during construction. Use those requirements to determine the order of work.
6. Finalize Design, Measurements, and Materials
Design planning should combine appearance with function. Before ordering products, confirm the room dimensions, furniture requirements, door clearances, appliance positions, storage needs, and location of existing services.
Prepare a Design Brief for Each Room
Record the following details:
- Intended use of the room
- Required furniture and storage
- Preferred colors and finishes
- Lighting and ventilation needs
- Accessibility and movement requirements
- Features that must remain unchanged
- Approximate spending allowance
- Any products that require special installation
For a kitchen, consider the relationship between the sink, cooking area, refrigeration, work surfaces, and storage. For a bathroom, think about safe movement, ventilation, water exposure, and access to fixtures.
A design that looks attractive but makes everyday tasks difficult will not deliver the full value of the renovation.
Verify Measurements Before Ordering
Measure the length, width, and height of each relevant space. Record doors, windows, fixed cabinets, columns, and service locations.
For complex work, have the contractor, designer, or installer verify critical dimensions before manufacturing or ordering custom products.
A cabinet that fits the wall may still obstruct a doorway. A refrigerator may fit into an opening but lack the clearance needed for its doors to open properly.
Check product dimensions, quantities, installation requirements, and delivery access before committing to purchases.
Select Materials for Their Intended Environment
| Area | Important considerations |
|---|---|
| Kitchen | Heat, grease, spills, cleaning, and wear |
| Bathroom | Moisture resistance, slip resistance, ventilation, and sealing |
| Bedroom | Comfort, noise, light control, and maintenance |
| Living room | Traffic, furniture movement, and durability |
| Outdoor areas | Weather exposure, drainage, and exterior suitability |
Compare long-term maintenance as well as purchase price. A cheaper material may require more frequent repairs or replacement, while an expensive product may offer little practical benefit in a lightly used room.
Professional tip: Check samples under the lighting conditions in which they will be used. Colors and finishes can look different under natural daylight and artificial lighting.
7. Confirm Permits, Approvals, and Regulations
Some renovations require permits, technical drawings, professional certification, or inspections. Requirements vary according to location, property type, and the work being proposed.
Cosmetic changes may have different requirements from structural alterations, extensions, or modifications to major building systems.
Which Renovations May Require Approval?
Potentially regulated work includes:
- Removing or altering structural walls
- Constructing extensions or changing the building footprint
- Making significant electrical or plumbing alterations
- Changing the approved use of a property
- Modifying protected buildings
- Altering shared structures in managed properties
These examples are not a complete list of legal requirements. Confirm the rules that apply to your own property before construction begins.
What Should You Do Before Work Starts?
First, describe the proposed work to the relevant local authority or qualified professional. Establish which permissions and inspections are required, and obtain the necessary drawings or technical documents.
If you live in an apartment or managed development, check building management rules and any restrictions on working hours, deliveries, shared services, or structural changes.
Keep copies of approvals and inspection records with the main project documents.
Do not assume that hiring a contractor automatically means the necessary permissions have been secured.
Common mistake: Beginning demolition before checking the approval requirements. This can cause avoidable delays, extra expenses, or the need to reverse unauthorized changes.
8. Select Reliable Contractors and Prepare a Written Agreement
The quality of the finished renovation depends on the planning, workmanship, supervision, and communication involved. Choosing a contractor based only on a low quotation can create problems if important work is excluded or responsibilities are unclear.
How to Compare Contractors
Ask each candidate about their experience with similar projects, availability, supervision arrangements, references, and approach to unexpected problems.
Where relevant, verify licenses, qualifications, insurance, and compliance with local requirements.
Compare quotations using the same written scope. Check whether they include preparation, labor, specified materials, delivery, waste removal, installation, and finishing.
Also examine exclusions. One contractor may include complete surface preparation while another may price only the final installation.
What Should the Contract Include?
A written agreement should establish:
- The exact scope of work
- Material specifications and agreed finishes
- Project price and payment milestones
- Expected start date and completion target
- Responsibilities for approvals and inspections
- The process for changes and additional costs
- Cleanup and waste-removal responsibilities
- Defect correction and warranty arrangements
- Procedures for delays and disagreements
The agreement should follow applicable local laws and clearly identify who is responsible for each task.
Use a Fair Payment Structure
Payments should correspond to clearly defined milestones and the agreement’s terms. Avoid paying the entire amount upfront without an appropriate contractual basis and safeguards.
Record payments, obtain receipts, and confirm the status of completed work before approving each milestone.
For a broader understanding of organizing construction work, consult the Construction Guide.
Professional tip: Ask contractors to explain what is not included in their estimates. Exclusions often reveal important differences that headline prices conceal.
9. Create a Practical Renovation Timeline
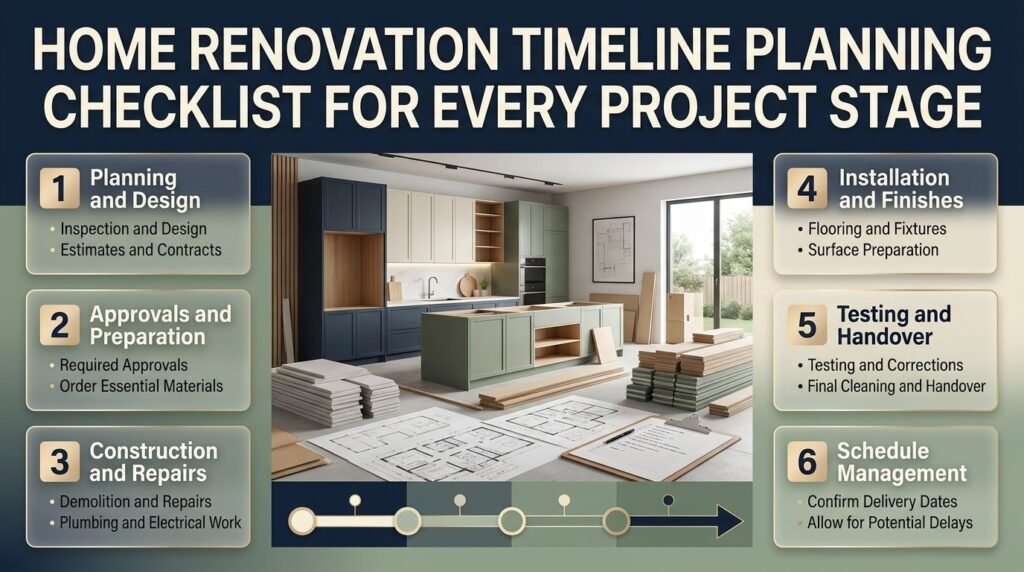
A renovation schedule should cover the entire process, not just the days when workers are on site. Design approvals, product lead times, inspections, delivery arrangements, and drying periods can all affect completion.
Establish the Main Project Stages
A typical sequence might include:
- Property inspection and planning
- Design development and cost estimates
- Contractor selection and contract signing
- Required approvals
- Material selection and ordering
- Site preparation and demolition
- Structural work and essential repairs
- Plumbing, electrical, and other services
- Wall closure and surface preparation
- Cabinets, flooring, fixtures, and finishes
- Testing, inspections, and corrections
- Final cleaning and handover
The exact sequence should be agreed upon with the people responsible for the work.
Allow Time for Dependencies
Some tasks cannot begin until others have been completed and checked.
For example, flooring installation may depend on acceptable moisture conditions, while custom cabinets may require verified measurements before manufacturing.
Ask your contractor to identify tasks that could delay the project if materials arrive late or decisions are not made on time.
Use target dates rather than assuming every activity will finish exactly as planned.
Prepare for Potential Delays
Common causes include material shortages, hidden damage, approval delays, weather conditions, contractor availability, and changes to the agreed design.
Build realistic allowances into the schedule and establish how delays will be communicated.
If you are coordinating the renovation with travel or another major commitment, finalize the essential decisions and supervision arrangements beforehand. The Plan a Journey guide can help you organize separate travel-planning tasks, while your renovation schedule should remain the central record for construction deadlines.
Quick tip: Confirm delivery dates for essential materials before starting work that depends on them. Early coordination can prevent workers from arriving at a site where the next task cannot proceed.
10. Prepare the Home and Household for Construction
Renovation can affect everyday life even when the work is limited to one room. Preparation protects belongings, reduces disruption, and helps everyone understand how to move around the property safely.
Prepare the Work Area
Before construction begins:
- Remove valuables and furniture from the work zone.
- Protect floors and surfaces that will remain.
- Establish safe access routes for workers.
- Confirm where tools and materials will be stored.
- Arrange suitable waste collection.
- Agree on working hours and access arrangements.
- Keep children and pets away from construction hazards.
- Protect adjacent rooms from dust where appropriate.
- Identify essential utilities that may be interrupted.
Use appropriate dust barriers and surface protection based on the type of work. Ask the contractor how the work area will be separated from occupied spaces.
Plan for Essential Facilities
If the kitchen is being renovated, arrange a temporary place to prepare meals. If the only bathroom will be unavailable, establish a practical alternative before work starts.
For extensive projects, consider whether temporary accommodation is necessary. The decision should account for safety, noise, dust, ventilation, utility interruptions, and the likely duration of disruptive work.
Also consider parking, deliveries, storage, privacy, and access to the property.
Protect Areas Outside the Renovation
Regularly check unaffected rooms for dust migration, accidental damage, or signs of water intrusion. Keep important documents and personal items away from the work area.
If exterior work is planned, coordinate access, drainage, and storage arrangements with the interior schedule. The Outdoor & Garden Care guide can support the separate planning of outdoor property upkeep.
11. Monitor Progress, Spending, and Changes
Once construction begins, regular communication helps identify problems before they affect multiple tasks. You do not need to supervise every technical activity, but you should understand what has been completed, what comes next, and which decisions require your approval.
Hold Regular Progress Reviews
Agree on a communication schedule with your contractor. The frequency will depend on the project’s complexity and the number of active work areas.
During each review, discuss:
- Work completed against the schedule
- Upcoming tasks and material deliveries
- Spending and remaining commitments
- Quality concerns and required corrections
- Inspection results
- Decisions needed from the homeowner
- Changes that could affect cost or completion
Keep records of important conversations, photographs of progress, invoices, and approved decisions.
Document Every Change
A change order records an alteration to the original agreement. It should explain the revised work, additional cost, schedule effect, and approval.
For example, replacing a standard bathroom fixture with a premium model may affect both the material budget and the installation schedule.
Before approving a change, ask:
- Is the change essential or optional?
- What additional work is required?
- Will it delay another task?
- How will it affect the remaining budget?
- Does it require additional approvals?
- Is the proposed solution suitable for the property?
Record the answer before authorizing the additional work.
Track the Budget Throughout Construction
Compare actual payments and outstanding commitments with the original estimate. Update the contingency balance whenever additional work is approved.
If costs begin rising, identify the reason and review optional improvements before cutting essential repairs.
Common mistake: Agreeing to several small changes verbally without recording them. Individually, they may appear affordable, but their combined cost can exceed the contingency reserve.
12. Complete Final Inspections Before Handover
A room may look finished while still containing incomplete work, operational problems, or missing documents. Final inspections help confirm that the agreed work has been completed and that outstanding issues have been recorded.
Use a Room-by-Room Handover Checklist
- Compare the completed work with the contract and approved plans.
- Check doors, windows, cabinets, and drawers for proper operation.
- Inspect visible finishes, flooring, tiles, and paintwork.
- Confirm that plumbing fixtures operate without visible leaks.
- Arrange appropriate electrical testing.
- Verify installed ventilation and other equipment.
- Confirm required inspections and approvals are complete.
- Record unfinished work and defects.
- Agree on correction dates for outstanding items.
- Collect warranties, manuals, and relevant certificates.
- Obtain final invoices and payment records.
- Confirm that construction waste has been removed.
Specialist systems should be tested by appropriately qualified professionals when required. Do not treat a visual inspection as a substitute for technical testing.
Prepare a Defect List
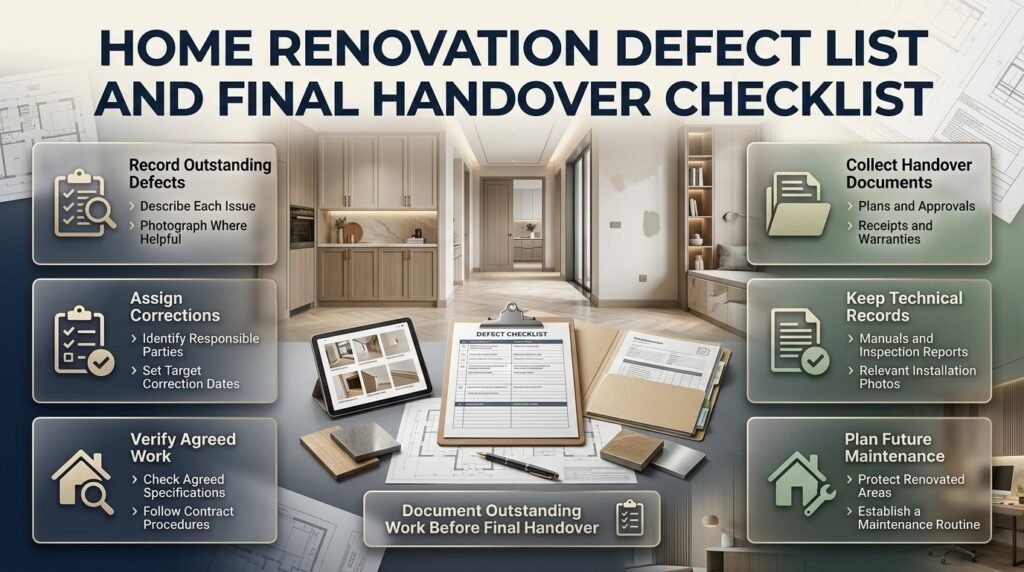
A defect list, sometimes called a snagging list, records incomplete work, damage, or items that do not match the agreed specification.
For each item, record a description, photograph where helpful, responsible party, and target correction date.
Review the contract and applicable law before withholding or releasing final payments. Follow the agreed procedure for resolving outstanding items.
Organize the Handover Documents
Keep the final plans, approvals, receipts, warranties, manuals, and relevant inspection reports together.
Photographs of concealed plumbing or electrical installations can also help future professionals understand the work, provided the photographs were taken safely and do not replace required technical records.
Once the project is complete, establish a suitable maintenance routine to protect the renovated areas.
13. Common Home Renovation Planning Mistakes and How to Avoid Them
Understanding common mistakes before construction starts can save time, money, and unnecessary frustration.
Mistake 1: Beginning Without a Clear Scope
Why it happens: The homeowner has a general idea but has not defined the details.
Why it causes problems: Contractors may interpret the same request differently, resulting in inconsistent estimates and disagreements.
How to avoid it: Write down the work required, materials, specifications, exclusions, and expected finish level before requesting quotations.
Mistake 2: Underestimating the Total Cost
Why it happens: The initial budget includes only obvious labor and material expenses.
Why it causes problems: Delivery, disposal, professional services, temporary arrangements, and hidden defects create additional commitments.
How to avoid it: Use an itemized estimate, check exclusions, and maintain a separate contingency reserve.
Mistake 3: Selecting Materials Too Late
Why it happens: Homeowners assume finishes can be chosen after construction starts.
Why it causes problems: Delayed deliveries and incompatible specifications can interrupt installation.
How to avoid it: Finalize essential products early and confirm their availability before scheduling dependent tasks.
Mistake 4: Choosing a Contractor Based Only on Price
Why it happens: The lowest quotation appears to offer immediate savings.
Why it causes problems: Missing items, poor coordination, or inadequate workmanship can increase the final cost.
How to avoid it: Compare quotations against the same scope and review experience, references, exclusions, and written terms.
Mistake 5: Ignoring Daily Household Needs
Why it happens: Planning focuses on the finished room instead of the disruption caused by construction.
Why it causes problems: Lack of cooking facilities, bathroom access, privacy, or safe routes can make the renovation unnecessarily difficult.
How to avoid it: Prepare temporary arrangements before work begins and confirm when essential services will be unavailable.
Mistake 6: Making Unrecorded Changes
Why it happens: Small adjustments seem too minor to document.
Why it causes problems: The parties may disagree about the price, scope, or completion date.
How to avoid it: Approve changes in writing and update the budget and schedule immediately.
Mistake 7: Ignoring Property Protection
Why it happens: Homeowners concentrate on the renovation area and overlook nearby spaces.
Why it causes problems: Dust, debris, water, and equipment can damage surfaces that were not intended to be renovated.
How to avoid it: Agree on protective measures and inspect adjacent areas regularly.
Mistake 8: Rushing the Final Inspection
Why it happens: Everyone wants the project completed quickly.
Why it causes problems: Defects, missing documents, or incomplete tasks may remain unresolved.
How to avoid it: Schedule a formal handover, record outstanding work, and collect the necessary documents.
14. Professional Tips for a More Efficient Renovation
Professional project management depends on clear information, coordinated tasks, and timely decisions. Homeowners can use the same principles to keep their projects organized.
Finalize Decisions That Affect Other Trades
Confirm major fixtures, appliance dimensions, and layout decisions before the dependent work begins. Cabinet dimensions, for example, can influence electrical outlets, plumbing connections, and countertop measurements.
Maintain One Central Project File
Store quotations, contracts, plans, approvals, invoices, product specifications, and change orders in one place.
A simple spreadsheet can track the original budget, approved additional work, payments, delivery dates, and outstanding decisions.
Protect the Contingency Reserve
Avoid treating the reserve as extra money for every attractive upgrade. Keep it available for unexpected conditions and necessary changes. If you choose to use some of it for an optional improvement, assess how that decision affects your ability to handle later problems.
Coordinate Material Deliveries
Check dimensions, quantities, delivery access, storage requirements, and return policies before ordering. Materials arriving too early may obstruct the site, while late deliveries can delay installation.
Protect Completed Work
Coordinate trades so finished surfaces are not unnecessarily exposed to dust, tools, or heavy equipment. Use suitable protection and agree on who is responsible for maintaining it.
Consider Long-Term Maintenance
Choose finishes and equipment that suit the household’s cleaning routines, usage patterns, and maintenance capabilities.
For example, a surface that requires frequent specialist treatment may be less practical than a durable alternative that is easier to maintain.
The Cleaning & Organization guide can help you consider the practical routines needed to keep the renovated home organized.
For a wider understanding of property upkeep and ongoing responsibilities, revisit Property Care.
15. Printable Home Renovation Planning Checklist
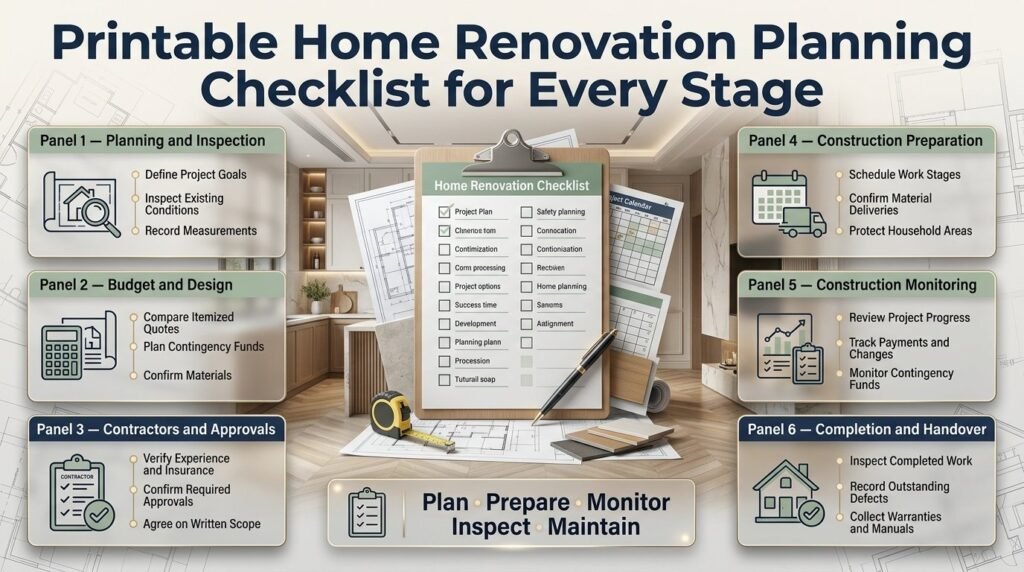
Use this master checklist to track your renovation from the first idea to the final handover. Adapt it to the size and complexity of your project.
Planning and Inspection
- Define the purpose of the renovation.
- Identify essential repairs and optional improvements.
- Inspect the property’s visible condition.
- Arrange specialist assessments where necessary.
- Prepare a written project scope.
- Record room measurements and existing conditions.
Budget and Design
- Obtain comparable itemized quotations.
- Estimate the full project cost.
- Set aside a suitable contingency reserve.
- Finalize layouts and material specifications.
- Confirm product dimensions and availability.
- Identify items that can be postponed if necessary.
Contractors and Approvals
- Check contractor experience and references.
- Verify relevant qualifications and insurance.
- Confirm permits and approval requirements.
- Agree on the written scope of work.
- Establish payment milestones.
- Record the process for approving changes.
Construction Preparation
- Establish the work sequence and target dates.
- Confirm material delivery schedules.
- Arrange temporary household facilities.
- Protect furniture and unaffected surfaces.
- Establish safe access and storage arrangements.
- Confirm working hours and communication methods.
Construction Monitoring
- Review progress regularly.
- Track payments and outstanding commitments.
- Document approved changes.
- Check material deliveries and specifications.
- Record concerns and corrective actions.
- Monitor the contingency balance.
Completion and Handover
- Compare completed work with the agreement.
- Arrange required tests and inspections.
- Prepare a defect list.
- Confirm correction dates for outstanding items.
- Collect warranties and manuals.
- Organize approvals, invoices, and final plans.
- Confirm waste removal and cleanup.
- Establish an ongoing maintenance routine.
What Should Be Included in a Home Renovation Planning Checklist?
A complete home renovation planning checklist should cover every major decision required before, during, and after construction. It should begin with your renovation goals and property inspection, then move to budgeting, design, contractor selection, approvals, scheduling, and final inspections. The purpose is to make sure essential tasks are completed in the correct order and important costs or responsibilities are not overlooked.
A well-organized checklist should include:
Project scope: Define which rooms need renovation, what work is required, and which improvements can wait.
Budget planning: Estimate labor, materials, professional fees, delivery, waste removal, and contingency funds.
Contractor arrangements: Compare itemized quotations, check relevant qualifications, and establish a written agreement.
Construction preparation: Confirm permits, material availability, work schedules, and temporary household arrangements.
Final inspection: Check completed work, record defects, and collect warranties, approvals, and relevant documents.
Keeping these details in one central project file makes it easier to track progress, control spending, and communicate clearly with contractors.
How Much Should I Budget for a Home Renovation, Including Unexpected Costs?
Your renovation budget should cover the complete project rather than only the contractor’s initial quotation. Labor, materials, demolition, professional services, permits, delivery, waste disposal, and temporary accommodation can all affect the final cost. You should also maintain a separate contingency reserve for unexpected repairs or necessary changes discovered during construction.
For preliminary planning, homeowners sometimes allow around 10–20% of the estimated renovation cost as a contingency. The appropriate amount depends on the property’s condition, project complexity, and how thoroughly the work has been investigated.
To build a more reliable budget:
Obtain detailed quotations based on the same scope of work.
Check whether taxes, delivery, installation, and cleanup are included.
Keep contingency money separate from funds allocated to optional upgrades.
Track approved expenses, payments, and outstanding commitments throughout construction.
Revise the project scope before work begins if the total exceeds your available budget.
For example, if the estimated renovation cost is 600,000 in your local currency, a 15% contingency would equal 90,000. Your working budget would therefore be 690,000, excluding any additional expenses not covered by the original estimate. This is a planning example, not a guarantee that the reserve will cover every unexpected problem.
What Should I Do Before Hiring a Home Renovation Contractor?
Before hiring a contractor, define your renovation requirements, inspect the property’s condition, establish a realistic budget, and prepare a clear description of the work. This allows you to compare quotations fairly and reduces the risk of misunderstandings once construction begins.
A professional contractor should be able to explain the proposed work, material specifications, estimated timeline, payment arrangements, and approach to unexpected problems.
Before making your decision, follow these steps:
Review relevant experience: Ask for examples of similar completed projects and references where available.
Compare written quotations: Check labor, materials, preparation, installation, cleanup, and exclusions.
Verify credentials: Confirm applicable licenses, qualifications, and insurance requirements in your area.
Review the contract: Ensure the scope, payment milestones, schedule, responsibilities, and change-order process are clearly documented.
Establish communication: Agree on how progress, delays, additional costs, and quality concerns will be discussed.
Avoid choosing a contractor solely because the quotation is the cheapest. A lower initial price may exclude important tasks that another contractor has already included. The better decision is based on the complete scope, relevant experience, transparent pricing, and clear contractual responsibilities.
How Can I Prevent Delays and Cost Overruns During a Home Renovation?
Preventing delays and cost overruns starts with completing essential decisions before construction begins. Unclear specifications, late material orders, hidden property defects, and unrecorded design changes can interrupt several connected tasks and increase the overall expense.
Although no planning method can eliminate every unexpected problem, a structured process can make the project easier to manage.
Use these practical measures:
Finalize important decisions early: Confirm layouts, measurements, fixtures, and material specifications before ordering or installation.
Build a realistic timeline: Include preparation, approvals, deliveries, inspections, and appropriate allowances for delays.
Investigate existing problems: Arrange professional assessments where structural, electrical, plumbing, or moisture concerns exist.
Monitor spending regularly: Compare actual expenses and outstanding commitments with the original budget.
Document every change: Obtain written approval for additional work, including its cost and effect on the schedule.
Communicate consistently: Review progress with the contractor and resolve decisions before they hold up other trades.
If an unexpected problem arises, ask for a written explanation and revised estimate before authorizing additional work, except when immediate action is needed to address an urgent safety issue. This approach helps you distinguish necessary repairs from optional upgrades and make informed decisions without losing sight of the original budget.
What Should I Check Before Considering a Home Renovation Complete?
A renovation should be considered ready for handover when the agreed work has been completed, required tests and inspections have been addressed, outstanding defects have been documented, and relevant project records have been collected. A room that looks finished may still have incomplete adjustments, operational problems, or missing documentation.
Before finalizing the project, carry out a systematic inspection with the contractor.
Check the following areas:
Workmanship and finishes: Inspect paintwork, flooring, tiles, cabinets, doors, windows, and visible fittings.
Plumbing and electrical systems: Confirm appropriate operation and arrange specialist testing where required.
Outstanding defects: Prepare a written list of incomplete work or items that do not meet the agreed specifications.
Approvals and certificates: Collect applicable permits, inspection records, and required compliance documents.
Financial records: Review final invoices, payments, and approved changes against the contract.
Maintenance information: Obtain product manuals, warranties, and instructions for caring for new materials and equipment.
Record defects with clear descriptions and photographs where useful, and agree on correction dates with the responsible contractor. Follow the written agreement and applicable local requirements when dealing with final payments or unresolved items.
Once handover is complete, establish a practical maintenance routine. Regularly checking moisture-prone areas, plumbing fixtures, seals, ventilation, and other relevant components can help protect the renovation and identify developing problems before they become more expensive to repair.
Conclusion
A successful home renovation begins with careful planning, realistic budgeting, and a clear understanding of your property’s needs. By following a Home Renovation Planning Checklist, you can organize essential repairs, compare contractor quotations, select suitable materials, establish a practical timeline, and prepare for unexpected challenges before they become costly problems.
Remember that every renovation decision affects the overall project. Prioritize safety and essential repairs, confirm the scope of work in writing, track expenses throughout construction, and inspect the finished work before completing the handover. Keeping your documents organized and planning for ongoing maintenance will also help protect your investment long after the renovation is finished.
Start by identifying your three most important renovation goals, assessing your available budget, and listing the tasks that need attention first. Break the project into manageable stages and complete each stage before moving forward with dependent work.
The best renovation isn’t necessarily the most expensive one; it’s the one that meets your household’s needs, stays within a realistic budget, and delivers lasting comfort, functionality, and value.